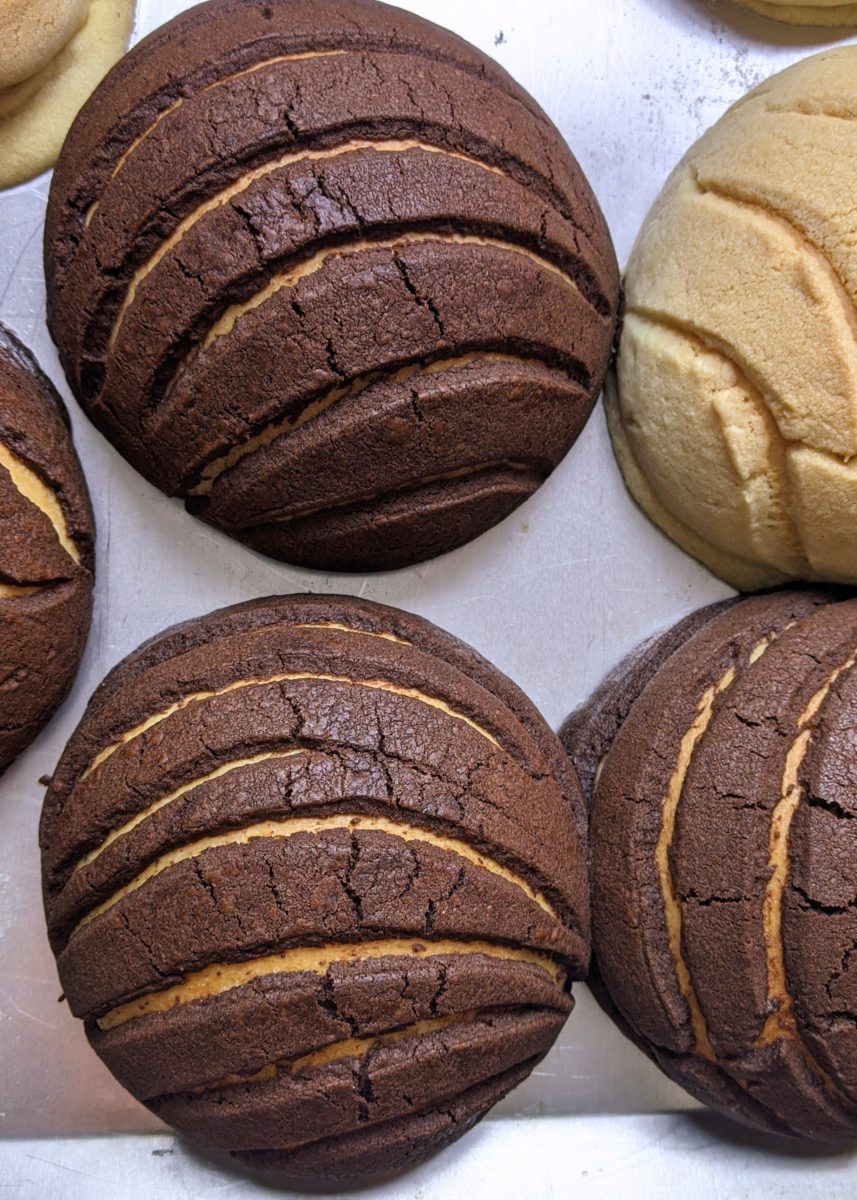
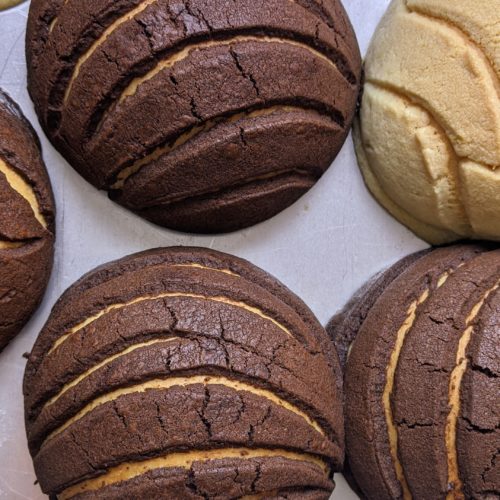
Conchas are a soft, enriched, brioche-type of bread, topped with a sweet and crunchy sugar cookie topping. These are some of the finer things in life.
Conchas are a Mexican favorite, and have grown in popularity over the years. I had gotten them from the market a few times before deciding to make them myself. I don’t regret this decision at all. I tried another version with my sourdough starter and loved that as well. I even made the topping with some maple extract and boy was it good! I used it as the bun for a breakfast sandwich!
They are usually enjoyed with coffee or hot chocolate, but are good at just about any time of the day. A little bit of work, but oh-so worth it!
Fluffy brioche buns, topped with a sweet sugar cookie topping. A Mexican staple. Dip in coffee or hot chocolate, or eat them on their own.
Course Breakfast, Dessert
Cuisine Mexican
Keyword bread, buns, concha, conchas, pan dulce, rolls
Author Erin Vittoria
Ingredients
DOUGH INGREDIENTS
120gbread flour
195gall purpose flour
4ginstant yeast
2eggs
125mL(1/2 cup) milkwarm
35gsugar
56g4 Tbsp butter, softened
6g1/2 tsp kosher salt
TOPPING INGREDIENTS
30gshortening or leaf lard
15gbuttersoftened
100gpowdered sugar
120gall purpose flour
1/2tspvanilla extract1 tsp if not using almond
1/2tspalmond extract
1/2tspbaking soda
Pinchsalt
Instructions
DOUGH INSTRUCTIONS:
In a stand mixer, mix together flour, yeast, sugar, and salt.
Add milk and eggs, and knead for 5 minutes.
Add softened butter a tablespoon at a time until it comes together in a cohesive dough. Add salt. Knead for around 8-10 more minutes, or until it pulls away from the sides of the bowl and you can pull a windowpane (grab the dough and pull slowly to stretch as thin as you can without it tearing. If you can see light through it, you're done kneading)
Proof dough until doubled. Make the topping.
TOPPING INSTRUCTIONS:
In a bowl, combine the flour, powdered sugar, baking soda, and salt.
Add in shortening and butter. Mash with a fork until no dry ingredients remain. Add extracts and combine thoroughly.
The dough shouldn't be too soft. The consistency should be like a thick cookie dough. If you find it is very soft, add equal parts flour and powdered sugar, 1 Tablespoon at a time until it gets thicker and less sticky. It should be tacky but not sticky, and slightly firm.
Refrigerate the topping for 20 minutes to stiffen up a bit. This will make it easier to work with when it comes time to pressing it out.
After the dough is doubled, punch down and cut into 8 equal pieces. Shape into tight balls. Cover with lightly oiled plastic wrap, a damp cloth, or an upside-down pan or bowl so they don't dry out while pressing out the topping.
Divide the refrigerated topping into 8 equal round pieces. Make sure they're slightly cold or you may have problems with sticking. Press with a tortilla press or roll out to about 1/8" thick. Place topping disk over each ball and press down lightly to adhere and flatten dough ball just a bit. (Not too hard) Stamp each top with a concha stamp, or use a round cutter or knife to lightly cut your design.
Proof the dough balls until visibly bigger and puffy. Heat oven to 350. Bake conchas for 18-20 minutes, Keep an eye on the topping and try to catch it before it browns. Buns should register 190ºF with a probe thermometer when poked in the center.
Cool on a wire rack. Keep covered on the counter for up to 4 days. The topping will soften as it sits.
Notes
• The shortening has a higher melting point than butter, so it helps the topping to stay put and not melt completely. If you absolutely must substitute all butter, add a bit more flour and powdered sugar. I haven’t tried this way, but it’s what I would do.• IMPORTANT! Make sure to refrigerate the topping. It tends to get pretty soft when at room temperature, and will be much easier to press without it sticking if it’s cold. Also it will be less likely to “melt” when baking if it’s cooler.